
Steam Piping Don'ts
There are some common mistakes made while installing steam boilers. I would like to try to have these mistakes avoided in future installations. Below are some drawings which show the mistakes and an explanation of why the installation may work less efficient or create noises.
Let's start with a diagram of a properly piped steam boiler per manufacturer's specs, US Boiler MegaSteam
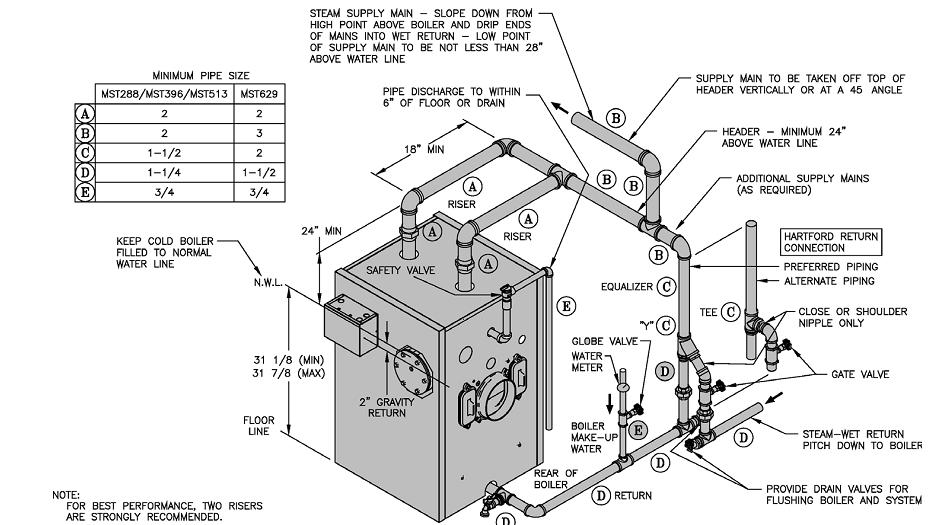
We will look at a drawing showing proper piping in the style drawing all the common mistake drawings are done.
Figure 1
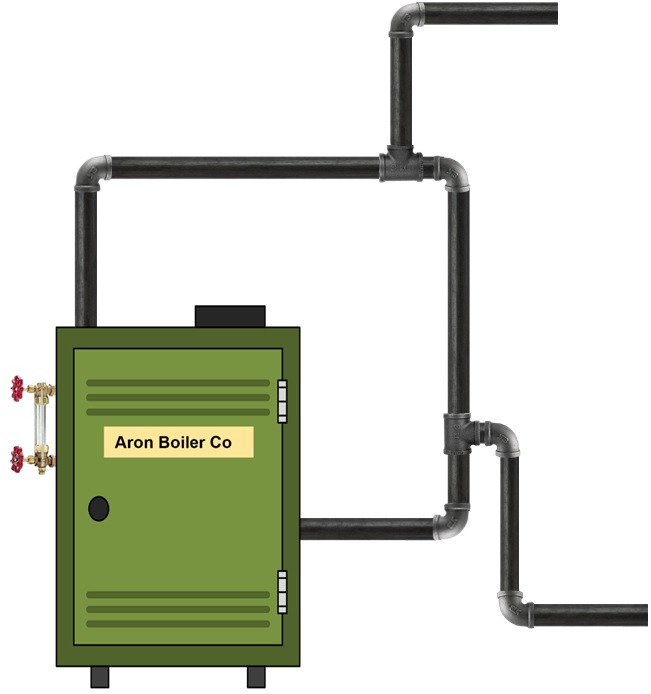
Now let's look at some improper steam boiler piping
The old boiler was removed and was located in the center of the home. The old system riser went up into the branch of a tee. The system mains went to the front and rear of the home.
Figure 2
The first mistake is you never want to send steam into the branch of a tee except in the boiler header. The steam goes up the 2" system riser, and into the branch of the tee. The system goes left and right with 2" pipe. When the steam gets into the tee and starts moving two directions it can move freely as it is leaving one 2" pipe going to two 2" pipes due to less resistance to flow. The velocity gets too great in the 2" system riser and it starts sucking some water up the pipe with the steam. This produces wet steam. Wet steam moves slower, travels less distance before turning back into condensate and causes the boiler to run more to produce more steam to satisfy the thermostat thus slower heating. The excess water build-up in the system mains can cause water hammer noises in the system and flooding of the boiler.
Proper piping after removing the Tee connecting two system mains together.
Figure 3
Break the cast iron fittings or cut the tee out and thread both system mains in place. Add a second tee to the boiler header and pipe up to the two system mains. Allow at least 6" from the last tee in the header to the ell dropping into the equalizer.
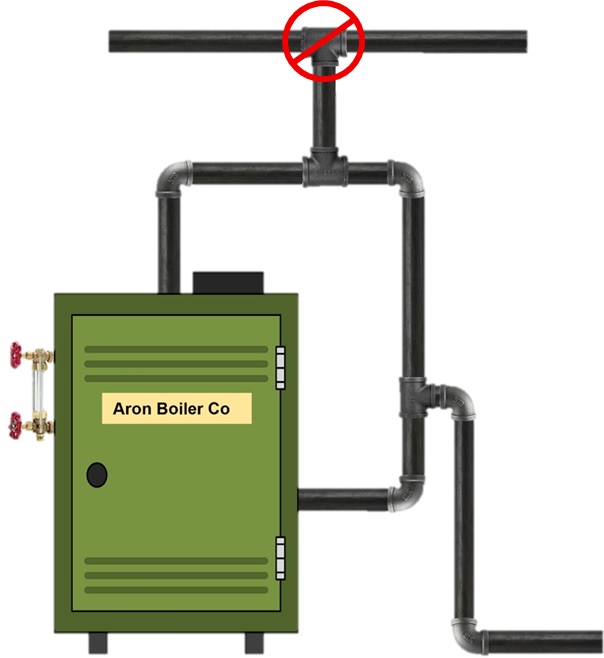
Never Pipe the Header into A Tee at the End of The Header
Figure 4
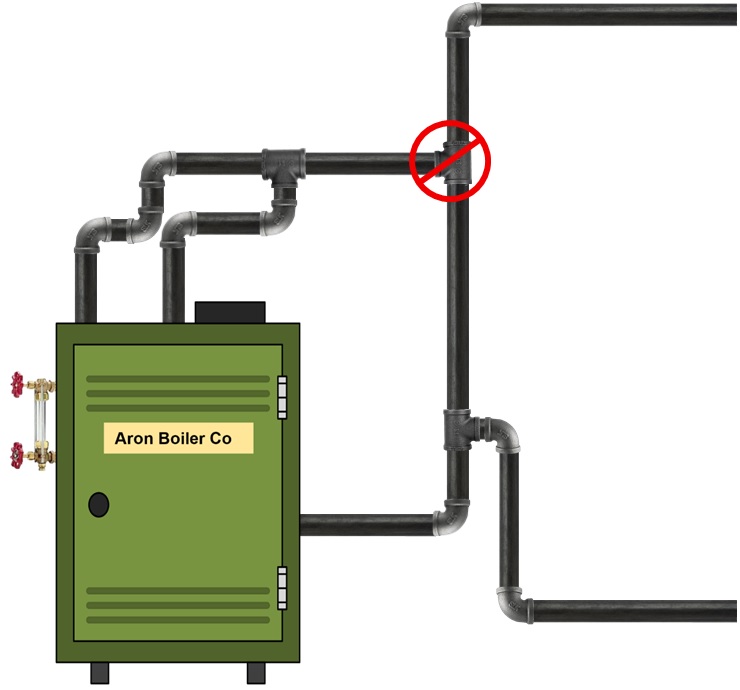
The header should always end in an elbow. If piped as this drawing shows the steam and water will move through the header and slam into the back of the tee at the end of the header. Some of the moisture will get back into the steam and cause wet steam again causing noises, and higher fuel bills. Must leave 6" residentially or 12" commercially between the last system riser tee to the end of the header.
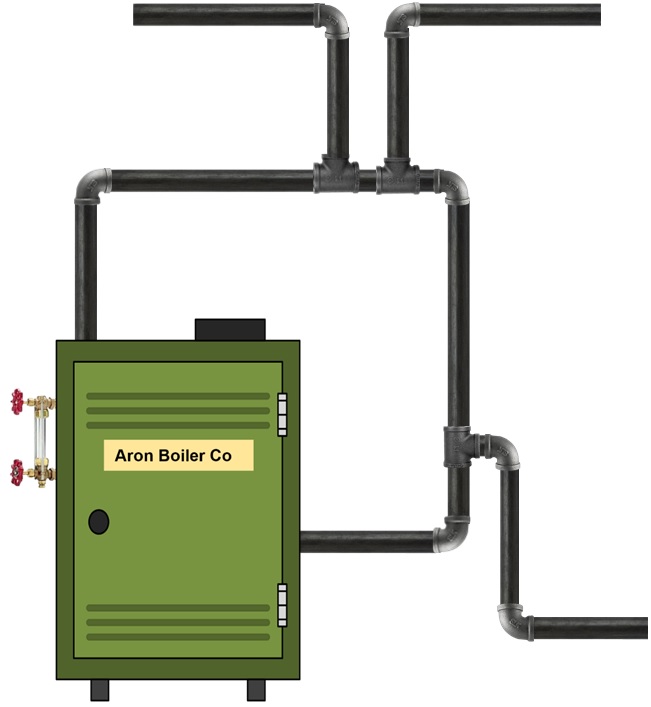
When the Boiler Has Multiple Boiler Risers
Figure 5
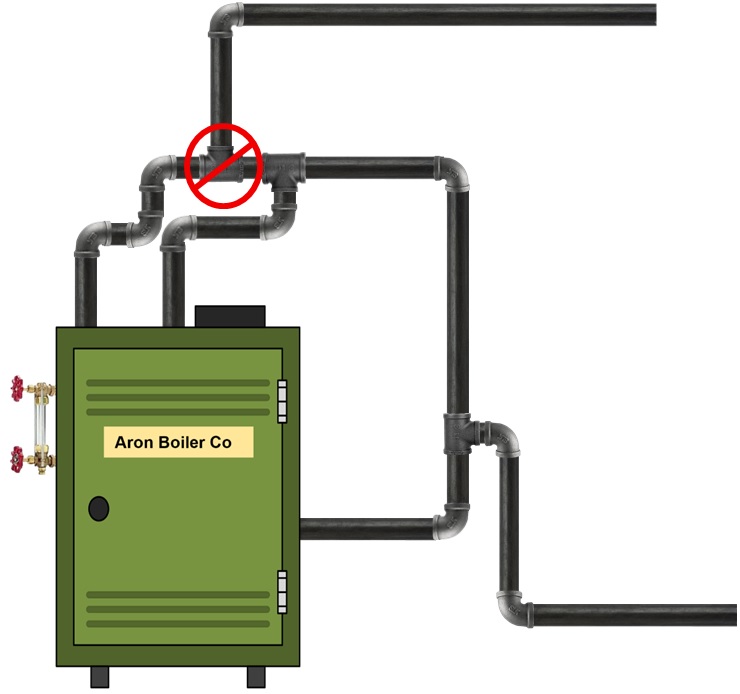
When installing steam boilers, you never want to pipe system risers between boiler risers. The system risers are always installed after all boiler risers are piped into the header. You always want the steam and water to be moving the same direction in the header. If the boiler is piped as in the drawing above the steam and moving water will have a head on collision. The steam increases in velocity as it goes up the system riser suck some water with it. This will create wet steam and water noises. The same rules apply as in a single riser. No tee at the end of the header (Figure 6.). Stay back a minimum of 6" residentially and 12" commercially.
Figure 6.
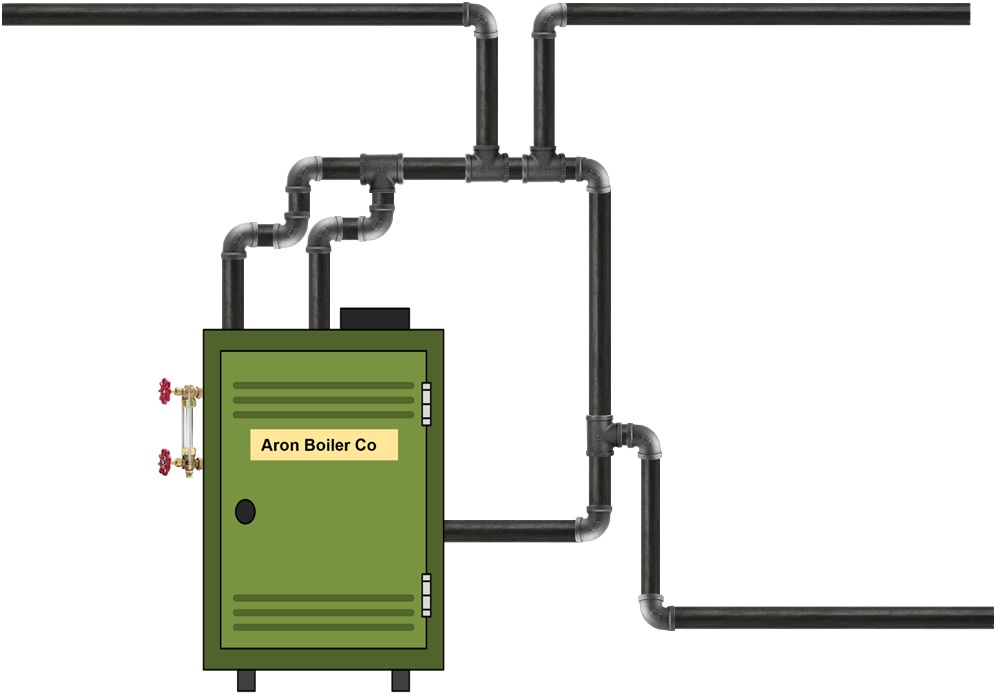
The proper way to pipe a single system riser and multiple system risers off a boiler header which has multiple boiler risers, see Figure 1. and Figure 3. above.
Disclaimer: The information found on this website is for informational purposes only. All preventive maintenance, service, installations should be reviewed on a per job situation. Any work performed on your heating system should be performed by qualified and experienced personnel only. Comfort-Calc or its personnel accepts no responsibility for improper information, application, damage to property or bodily injury from applied information found on this website as it should be reviewed by a professional.